CerusBrix is a unique fitness competition hosted by Cerus Fitness in Frederick, CO. In this article, I’m going to discuss the CerusBrix Open for 2022. I’ll briefly explain the format and testing dates, outline each of the 4 workouts, and then discuss training & strategy. By the end of this article, I hope to…
- convince you to sign up, if you haven’t already
- help you train over the next few weeks
- share a few tips to optimize your performance during the competition
CerusBrix Overview
Before we start, let’s briefly explain what CerusBrix is, and breakdown the three formats that take place at different times throughout the year.
CerusBrix tests an athlete on the 4 pillars of fitness:
- Speed
- Strength
- Agility
- Endurance
Each pillar has a workout associated with it, and you must complete all 4 workouts (except Duos, where each partner completes 2, see below). It aims to reward the most well-rounded athlete—someone who is strong, fast, agile, and can endure a longer, more grueling workout.
CerusBrix exists in the following varieties:
- CerusBrix Solos was held in January. It’s a single-day, individual competition. Each competitor completes 4 workouts with limited rest between each one. The athlete with the best combined score after all 4 events, wins.
- CerusBrix Duos was held in March. It’s a single-day, partner competition (teams of 2). Each partner completes 2 workouts (for a total of 4) on the same day, with limited rest. Each athlete’s score is combined with their partner’s score. Highest score wins.
- CerusBrix Open will be held from July 1-23. It consists of 4 workouts, but each workout is performed on its own day, and judged by an official judge at Cerus Fitness. You’ll have a one-week span to come into the gym and perform each workout. You’ll be scored on all 4 workouts, and your combined score will determine whether or not you move onto the next stage—semifinals.
After the Open, the top 66% advance to Semifinals.
After semifinals, the top 33% advance to the Championship.
I’ll discuss the Semifinals & Championship in-depth in another article.
CerusBrix Open: Overview & Dates
The rest of this article will focus on the CerusBrix Open. Let’s take a look at the specifics of the competition and go over some dates.
- The competition takes place from July 1-23, 2022
- There are 4 total workouts
- All workouts will be performed at Cerus Fitness
- Each workout will be scored by an official judge, provided by Cerus Fitness
- Your 4 scores will be combined for one final score
- The top 66% of athletes (no more than 20 per division) will qualify for Semifinals
- Semifinals is included with your registration to the Open. Qualified athletes can choose whether or not they’d like to compete.
- The top 33% of athletes (no more than 10 per division) from Semifinals will qualify for the Championship.
CerusBrix Open Testing Dates
Each of the 4 workouts has a specific timeframe in which you must complete the workout. Exceptions can be made for travel and extenuating circumstances.
- Speed: July 1-7
- Strength: July 6-12
- Agility: July 11-17
- Endurance: July 16-23
You’ll notice there is two days of overlap for each workout. This would allow you to test two workouts on the same day, or back-to-back, with a brief rest period. For instance, you could do both Speed & Strength on the same day… or Strength & Agility… or Agility & Endurance. If you’re going to go this route, just make sure you communicate with the Cerus team when you schedule your tests.
You must schedule all tests 24 hours in advance. No walk-ins allowed.
Be sure to arrive at least 20 minutes early to get warmed up and set up any equipment you need for that particular workout.
You will not receive a score for any workout that is not completed by close of business on July 23rd.
If you test a workout outside of its official time window, you forgo your right to retest that workout. In other words, you test that workout one time, and that’s your score. Period.
Retesting
Every athlete is allowed to retest each workout one time.
- Both the original test & the retest must be performed in the official time window for that workout
- A minimum of 24 hours is required before you can retest a workout
- Retests are subject to judge’s availability; they are not guaranteed
CerusBrix Semifinals
If you advance to Semifinals, you will choose one of the following days to complete 2 workouts. Both workouts are completed on the same day, at Cerus Fitness, and scored by a judge.
- Saturday, July 30
- Saturday, August 6
The top 33% of athletes (no more than 10 per division) will qualify for the Championship.
CerusBrix Championship
The Championship takes place on August 27, 2022 at Cerus Fitness. It requires a separate registration & fee.
CerusBrix Open Scoring
The scoring for the CerusBrix Open is a bit different than most other fitness competitions. All three CerusBrix formats—Solos, Duos, and the Open—count towards the athlete’s score for the Open. And the athlete’s Open score is combined with their Semifinal score to determine who makes it to the Championship.
Once an athlete reaches the CerusBrix Championship, scores are reset to 0.
CerusBrix Open Workouts
The CerusBrix Open consists of 4 total workouts—speed, strength, agility, and endurance.
NOTE: Anywhere you see four different weights/distances separated by a forward slash (/), that indicates the four divisions—male open/male masters/female open/female masters.
1. Speed
The Speed workout is as follows:
For Time:
- Run 400m
- 1:00 mandatory rest
- 25 sandbag+person over the wall (48″ wall) (60#/40#/40#/20#)
- 1:00 mandatory rest
- Run 400m with sandbag (60#/40#/40#/20#)
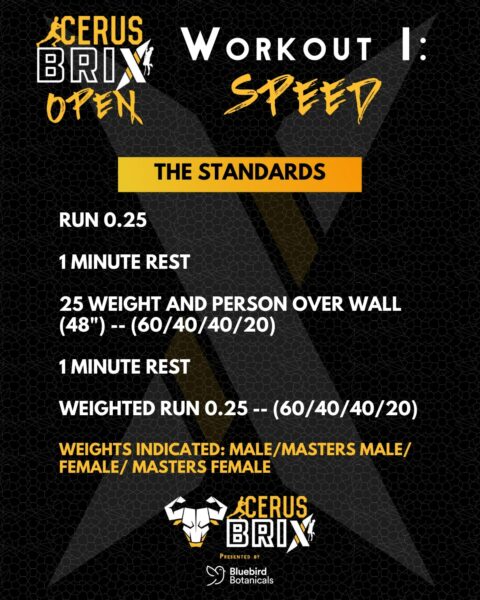
Here are the workout standards:
Strategy
The best strategy will depend on your strengths as an athlete, but…
- If you’re a strong runner, push the runs. The first run should be really fast. You’re completely fresh, and you will recover quickly in the 1:00 rest.
- Remember this is the Speed Brix. It’s supposed to be fast. You should hit your redline and try to hold on. I expect to hit my redline around the 20th wall over.
- Practice the wall overs. If you do the workout having never done them before, you will almost certainly fumble with the bag, and it will cost you seconds. Even if this means you come in 45 minutes before your test time just to try a few reps.
- Every second counts in a workout like this. Try to be mistake free.
- Sell your soul on the final run. Expect it to hurt, bad.
Testing
I haven’t tested the workout in its entirety yet, but I tried out the pieces individually.
For the runs…
- My first run was 1:30
- My sandbag run was 1:50, but I didn’t do the wall overs, so I was more fresh than I’ll be during the workout. Let’s say my sandbag run would be ~2:00.
- That equates to a sandbag run that is 33% slower than my unweighted run
- Running with objects/weight is one of my strong suits. If running and/or running with weight isn’t your strong suit, your sandbag run might be closer to 40-45% slower.
I just wanted to give you an idea where I’m at so when you test this yourself, hopefully you aren’t shocked by your sandbag run time.
For the wall overs…
- I’ll probably do the first 10 pretty fast/hard
- The middle 5-7 reps a little bit slower to catch my breath for a second
- And finish with the last 8 reps really fast/hard
As for technique, there are a lot of ways you can do this. The bottom line… find what works best for you.
Secret Hint: I tried out what I’ll call a “touch & go” method that worked pretty well. I don’t think it’s sustainable for the entire 25 reps, but it proved to be quite fast. I’ll probably try it for my final 8 reps or so. Good luck guessing what it is… 😜
Training Ideas
1. Practice running with weight
If you have a sandbag, start running with it. Have a weight vest? Use that instead, but instead of wearing it, throw it over your shoulders. If you don’t have either, you could use a dumbbell(s). Throw a towel over your shoulders or wrap the dumbbell(s) in the towel.
Specifically work on the 400m distance, but also throw some 800s in there as well. You can also do some hiking uphill on a treadmill with weight on your back. Get used to the weight pushing down on you.
2. No wall, no problem
Many of you won’t be able to recreate a 48″ high wall of soft boxes. Here’s a workout you can try that will give you a similar stimulus:
Run 400m
Rest 1:00
5 rounds of:
5 sumo deadlift high pulls (75#/55#/55#/35#)
5 box step overs (30″) *
Rest 1:00
Run 400m with weight
* Put two 30″ boxes side-by-side and use your hands as you get over the box
2. Strength
The Strength workout is as follows:
15-minute max distance sled push:
- 1 length = 50 feet
- Each length is broken up into five 10-foot sections
- Every 10-foot section counts as 1 rep
- All athletes start with an empty sled (155#)
- At the end of every 1 length, add weight (45#/25#/25#/25#)
- Continue adding weight each length until you’ve pushed the sled 15 total lengths
- If you’ve completed all 15 lengths and have time remaining, continue to push the sled with the current weight. Each 10-foot section you complete is an additional rep added to your score.
Here are the weights (in lb) for each division, including the sled itself, which weighs 155 lb.
| Length | Male Open | Male Masters / Female Open & Masters |
|---|---|---|
| 1 | 155 | 155 |
| 2 | 200 | 180 |
| 3 | 245 | 205 |
| 4 | 290 | 230 |
| 5 | 335 | 255 |
| 6 | 380 | 280 |
| 7 | 425 | 305 |
| 8 | 470 | 330 |
| 9 | 515 | 355 |
| 10 | 560 | 380 |
| 11 | 605 | 405 |
| 12 | 650 | 430 |
| 13 | 695 | 455 |
| 14 | 740 | 480 |
| 15 | 785 | 505 |
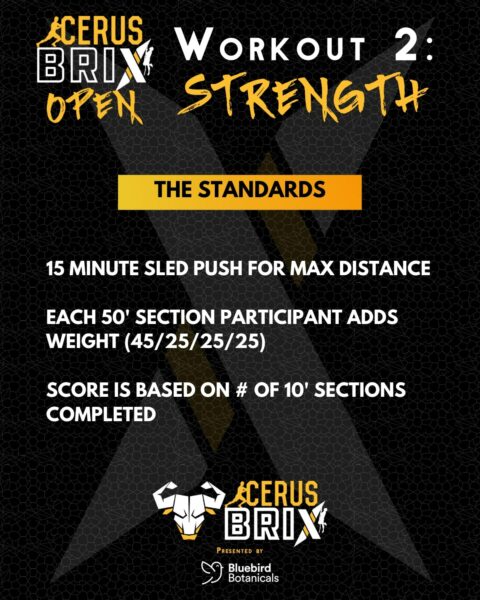
Here are the workout standards:
Strategy
Let’s talk dos and don’ts of the 15-minute sled push.
1. Feet first
Before we even talk about actually pushing the sled, we need to consider our footwear. Without the proper shoes, your workout is doomed from the start.
There are too many different types of shoes for me to recommend specific ones, but the point here is to practice. Practice pushing 1) a heavier sled, 2) on artificial turf, 3) with different shoes you are comfortable wearing. Practice at Cerus, if possible.
I’ve seen people’s shoes slip before they even got a chance to test their strength and capacity to push the sled. Don’t make your shoes the limiting factor.
2. Straight or bent arms
I’ve seen people push sleds with their arms in 3 main positions:
- arms straight, fully locked out
- arms bent, elbows below the hands, with shoulders almost touching the vertical poles directly above the hands
- arms bent, but almost an underhand grip, with the hands below the elbows. Shoulders still touching the vertical poles, but much farther away from the hands.
Arms straight vs. bent will put your legs in a slightly different position. Test out both to see how it feels.
The underhand grip puts a lot of strain on your biceps. It will also put your head position through the poles, where the plates get stacked. That becomes an issue with the heavier sleds, where the plates will occupy the space where your head wants to go. For these reasons, I don’t recommend this method.
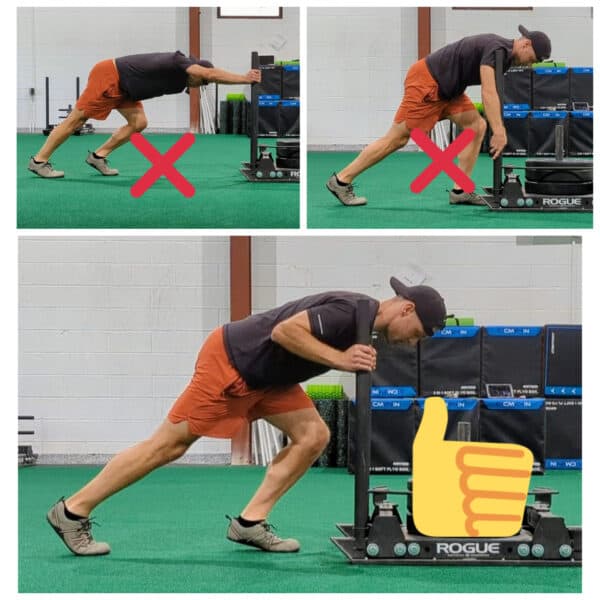
I prefer the arms bent, shoulders almost touching the vertical poles. You might need to shift your head slightly to one side once the stacked plates get to head height, but I’ve found this to be a stronger pushing position than straight arms. It’s also less taxing on the shoulders, which is smaller muscle group compared to using more legs.
3. Cardio strength
Don’t be fooled by this being categorized as a strength workout. It’s just as much a cardio workout. I don’t recommend sprinting the first few sleds, even though you can because they’re so light. The longer you can postpone the burn in your legs, the better you’ll fare.
4. Momentum
Use it to your advantage. It takes more energy to move a sled from a standstill than it does to move an already moving sled. When the weight gets heavy, focus on small, consistent steps, and keep it moving forward.
Similarly, when you get to a transition point, if you need to rest a little longer before you start, that might be a good plan. Give yourself enough rest where you think can push the sled at least ⅓ or ½ of the way down the turf. You don’t want to stop 4+ times on any 50-foot section… if you can help it. You might need to when it gets really heavy.
Testing
I briefly tested the first 5 lengths (155,200,245,290,335). It took me 1:55 and I was very out of breath. I’m not sure I could’ve kept that same effort, so that might’ve been a bit too fast for me to start.
Training Ideas
1. Start pushing a sled
If you haven’t been pushing a sled, get on it. Make it part of your warmup before every workout. Do 1-2 empty sleds, then add on a few plates with each length. Don’t go super heavy during your warmup.
After your workout, consider pushing a heavier sled. Even if it’s just one 50′ length, it’s still beneficial.
2. Practice the workout, as is
This is one where it might be a good idea to practice the workout exactly as it’s written. If you haven’t been pushing sleds, spend a week or two working on it, and then give it shot.
Pay attention to when your legs really start to burn. Did you go out too fast? Are you needing to take long breaks? If so, consider a slightly slower, more steady approach.
3. Cardio, then heavy sled
Load up a heavy sled. Put 1 extra plate on either side of the turf (so you can make two weight jumps). Your final weight should be a weight you are confident you can push, even if it takes you 60-90 seconds to push 50 feet.
- Perform 10 minutes of easy cardio to warm up (run, uphill hike, bike, row)
- Perform 8 minutes of moderate-hard cardio, gradually increasing effort each minute (50→80% RPE)
- Perform three 50-foot sled pushes, adding your prescribed weight with each length
This should give you a pretty good idea what the end of the workout will feel like, pushing a heavy sled with tired legs.
3. Agility
The Agility workout is as follows:
12-minute AMRAP:
- 50-foot double DB front rack lunge (35#/30#/25#/20#)
- 300-foot weighted shuttle run (20#/14#/14#/10#)
- 50-foot box over (30″/24″/24″/20″)
- 250-foot farmer’s carry (35#/30#/25#/20#)
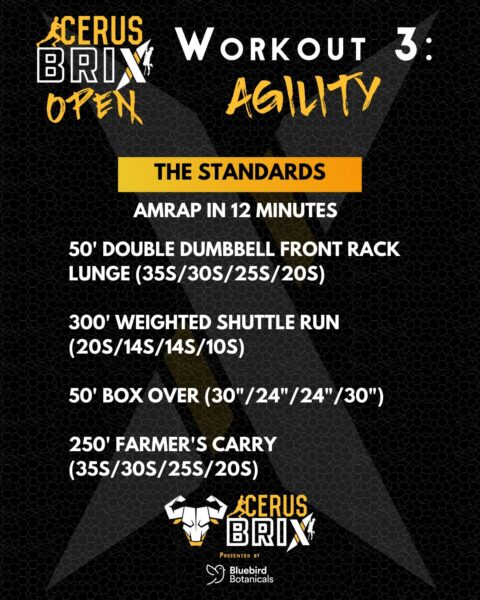
Here are the workout standards:
Strategy
1. Pacing
Pacing is going to be crucial in this workout. The 12-minute time domain is tricky—go out too fast, and you’ll be dying at minute 4. Pace too much and you might still have some left in the tank when the workout ends.
I might try to do negative splits; get a little bit faster with each round. Then in the final 90 seconds, empty the tank.
You’ll only be able to do this if you test the workout beforehand. If you can’t set up 6 boxes across a 50-foot stretch, just use a single box, go over it, walk two steps out, two steps back, and go over it again. Do this 6 total times.
Even if you were to practice the shuttle runs without any weight, it’ll still be helpful to gauge your effort, and get an idea for what pace you can hold.
2. Breathing & resting while moving
Another reason to practice this workout is to figure out where you can breathe. This might differ from person to person, depending on your strengths. Try to find at least one movement out of the four where you can maintain a steady pace, but also catch your breath and lower your heart rate slightly.
This could end up burning in a similar way to the Speed Brix, but it’s a longer time domain, and there is no mandated rest, so you can’t go at quite the same break-neck speed. You need to manufacture your own rest.
3. Count your steps
When you set up this workout, do at least one length of lunges and count your steps. Pay attention to how many steps it takes you, as well as how close you are at the final step.
If you end up really close to the line, but still need one more step, consider trying it again with slightly longer steps. The idea here is to spread the extra length evenly throughout all your steps instead of taking one giant step at the end to get over the line. Giant steps can throw off your balance. You might fail the rep and have to go back. Giant steps can also be more taxing on your legs.
And count your steps in the workout itself. This helps you gauge how many you have left until you’re finished.
4. Step, don’t jump
I highly recommend stepping over the box. Jumping requires more effort, and the dismount into the next box is a bit awkward. When you step, you can get into a nice flow from box to box, not to mention it requires less energy.
Gentleman going over the 30″ box… start working on that hip mobility. Stepping up to a 30″ box is no joke. Flexible hamstrings and hip flexors are your friends.
Testing
I tested this Brix in its entirety. Some things I’ll mention that might help you out:
- Some rounds will require an extra 50′ jog to get the dumbbells for the farmer’s carry. These rounds will be slightly longer than the others.
- My heart rate stayed very consistent. I probably should’ve pushed harder at the end (the last 1:30).
- There’s no real muscle fatigue with any of these movements. It was almost entirely a cardio workout, with a heavy focus on the legs.
- I don’t think the dumbbell weight will affect many people on the farmer’s carry. It might be an issue for a few on the lunges, but you can push through.
- I’m 5’11” and it took me 16 steps to lunge 50 feet
- Carry the med ball at your waist or on your shoulder. I tested both. Neither is faster. I think it’s all personal preference.
- Of all the movements, the box overs felt the most like rest… but they are also the thing you spend the least amount of time on.
I went at about 80% effort and here are my round times:
2:17
2:12
2:29
2:15
2:30
I think 3 and 5 were the rounds I had to do an extra 50′ before starting my farmer’s carry.
Training Ideas
Shuttle runs provide a different stimulus on your body than typical running. Be sure to practice quick starts & stops, and turning around. Basically, add some shuttle runs before and/or after your workout.
You could even add some bodyweight lunges and farmer’s carry and you’ve got yourself a nice little lower body/cardio warmup.
4 rounds of:
50′ sled push
100′ shuttle run (down-and-back)
50′ bodyweight lunges (down)
150′ farmer’s carry (back-down-back)
* Start with the sled & dumbbells on the same side
You’ll definitely want to see what your prescribed weight feels like for the lunges, but a lot of the other leg work you’re (probably) already doing will transfer over.
Hip mobility
For stepping onto the boxes, hip mobility might play a factor. If you don’t have the greatest hip mobility, here are a few exercises you can work into your routine over the next few weeks. It’s also a good idea to use these movements in your warmup before you test.
- ATG split squat (video)
- Elephant walk (video)
- Plank psoas march (video)
- Duck walk (video)
- Banded good mornings (video)
4. Endurance
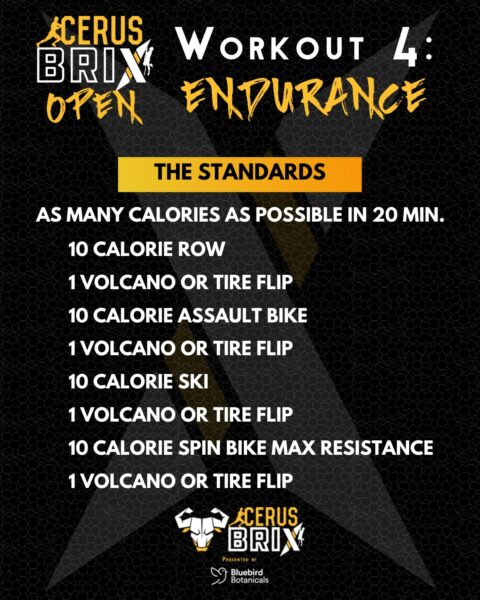
The Endurance workout is as follows:
As many calories as possible in 20 minutes:
- 10 calorie row
- 1 volcano or tire flip
- 10 calorie Echo bike
- 1 volcano or tire flip
- 10 calorie ski erg
- 1 volcano or tire flip
- 10 calorie spin bike (max resistance)
- 1 volcano or tire flip
Male Open: 250# volcano flip
Female Open/Male Masters: 180# tire flip
Female Masters: 120# tire flip
Here are the workout standards:
Strategy
The endurance workout looks pretty straightforward on paper. 10 calories on each of 4 different monostructural machines, with a tire flip between each one. While it is simple in its design, it’s far from easy. And believe it or not, there’s still a decent amount of strategy you can use to perform your best.
1. Don’t go out hot
I’m sure you hear this a lot. In any race, competition, or HIIT workout, you never want to blow yourself up at the beginning. If you do, you risk slowing down considerably in the back half of the workout, and detracting from your overall performance. It also hurts… like, really bad.
This is especially true in this workout. If you’ve ever tried to bike, ski, or row when you’re already exhausted, you know exactly what I mean. These machines will feel exponentially more difficult if you go too hard at the start. Your pace will slow down dramatically, and your overall time will suffer. You might also spend a few minutes looking for a puke bucket.
2. Transition quickly
For the sake of this example, let’s say…
- it takes you 30 seconds to do each of the 4 machines
- another 30 seconds to do 4 tire flips
That’s 2:30.
Once we account for transition time between machines and flips, let’s call it 3:30 per round.
- Each round has 8 transitions
- 3:30 per round for 20:00 is between 5-6 rounds
- That’s 40-48 total transitions in the workout 🤯
Be intentional.
- Practice getting off and on the machines quickly
- Is it worth securely strapping your feet to row 10 calories? If that costs you 5 seconds each time, and you row 6 times, that’s 30 seconds.
3. Rest & breaks
Most people will feel like they need to take a break at some point during the workout, but let’s be smart about how we rest.
Practice breathing while moving on the machines. You’ll need to slow down your pace, but teach yourself how to recover while moving. Resting before you get back on the machines will cost you valuable seconds.
Immediately after the tire flip, get right back on the next machine, and start moving. Stay at that slower pace until you feel yourself starting to recover, then you can ramp back up.
4. Efficiency before effort
Effort obviously matters. Push yourself. Go hard. But in a longer workout with this much machine work, efficiency wins out over pure effort every time. Here’s why:
- The more efficient you are, the less energy you expend. And the more you can conserve energy in this workout, the further you’ll go.
- In a 20-minute workout, efficient calories are faster than hammering out of control calories.
Improve your form on each machine. Stay in control. Then go as hard as you can while maintaining efficiency.
5. Brace for the flip
In a longer workout where you’ll be breathing hard, it’s easy to lose control of your breath. When we this happens, we often forget to brace our midline when we go to lift something off the ground. You’ve all probably seen or heard about the back rounding during a deadlift when you’re 10+ minutes into a workout.
As soon as you get off the machine, think about your breath. Start getting it under control as best you can. As you walk up to the tire or volcano, take one more deep breath and brace your midline. Engage your core (which includes your back, don’t forget 😉). Then lift.
6. Spin bike at max resistance is WHOA 😳
On Monday, June 20th, I cranked the spin bike resistance all the way up for the first time. Hot damn is it a lot of resistance. I had to get out of the saddle to get any kind of momentum going.
I highly recommend trying this out before you test. Because of the resistance, this could end up being the machine you spend the most time on.
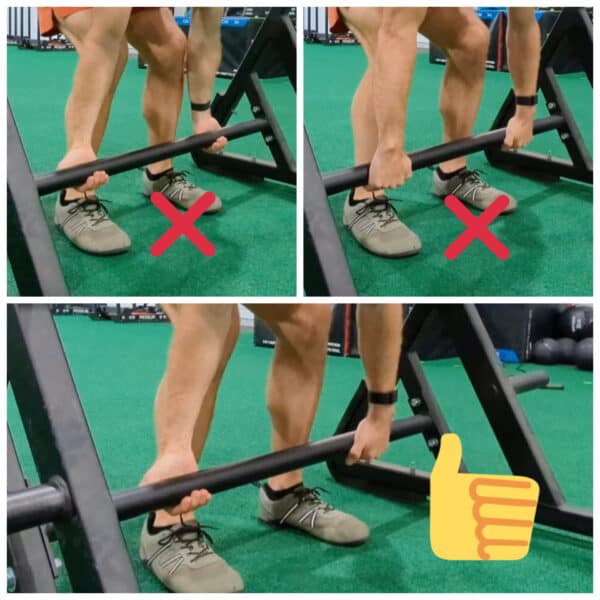
7. Volcano hand placement
I’ve tested overhand, underhand, and mixed grip. Mixed grip wins, by a long shot.
Testing
I tested this in full on June 28.
- The most challenging piece of equipment is the spin bike. Just keep it moving, and most of you will be out of the saddle, unless you’re an absolute beast.
- Transitions are key, as I suspected. Know exactly where you’re going to step to get to the volcano/tire 2-3 calories before you’re finished.
- Getting your feet in and out of the spin bike sucks. But putting your feet on the bottom of the pedals sucks worse.
- For men… 5 full rounds is solid. 5 1/2 rounds should get you to semis. 6+ rounds is a pretty elite effort.
- For women… 4.25-4.5 rounds is solid. 4.75-5 rounds should get you to semis. 5.25+ is pretty dang fit.
For those looking to push hard, here were my approximate efforts:
- Row between 1200-1400 cals/hr
- Echo bike around 68 RPM and (I think) 320-350 watts
- Ski erg around 1100 cal/hr
- I kept a consistent pace for 17:00 and pushed harder the final 3:00. If you’ve got a big engine, maybe try to push hard for the final 5:00 and see if you can hold on.
Training Ideas
Plain and simple… get better at each of the 4 machines. Research technique. Play around with damper settings, foot placement, seat height, etc.
Practice transitions
5 rounds of:
5 cal row
5 cal Echo bike
5 cal ski erg
5 cal spin bike
The idea behind this workout is just to practice getting in and out of the machines. Perform the 5 cals at a moderate intensity. Try a few different things. Grab the handles in a different way. Strap your feet differently, or not at all.
Go hard!
Since you’re only doing 10 calories at a time, I would practice 10 cals hard on each machine. Go much harder than you’ll go in the workout itself, but these harder efforts will help increase your power output, which will make you not dread the machines as much when you have to ride them for 20 minutes, when you’re exhausted. 😉
4-6 rounds of:
10 cals hard (90%)
5 cals recovery (65-70%)
* Only do this for one machine per day. If you know you need more work on one over another, put your focus there.
The recovery will teach your body how to recover while still moving and accumulating calories, as opposed to only recovering when you’re stopped or completely resting.
Tire flips
Practice them if you have access to a tire, but if you don’t, here are a few movements you can add to your workouts that will make you a better flipper of giant tractor tires.
